Strategy Guide
Welcome to my strategy guide for the board game Dominion, designed by Donald X. Vaccarino.
New players tend to make the mistake of buying lots of action cards the first few times they play. Usually they buy lots of different action cards, perhaps even one of each. That’s fine, and is even arguably the best way to learn the game. If you are a new player and you are playing against other novices then you can all have a nice time doing that. However, sooner or later, one of you is going to figure out that there are much more efficient ways of building a deck – ways involving focusing on particular cards, with an overarching strategy.
The first strategy I am going to talk about is what is often called the ‘Big Money’ strategy. This is a really simple strategy that can be played no matter which ten kingdom cards are selected. The idea is, you pay very little attention to the action cards, and focus instead on acquiring first silver, then gold when you can afford it, then provinces. Just following this strategy with no refinements at all is usually enough to beat an inexperienced player who is just buying lots of action cards that he likes the look of. We can use the number of turns it takes (assuming no interference from other players’ action-attack cards) to acquire 4 provinces as a measure of how efficient the deck is, because the player who reaches this milestone first is likely to win the game. A pure Big Money deck will usually take 17 turns to acquire 4 provinces, which is much quicker than a typical beginner’s strategy. However, the Big Money Strategy can be improved even further just by adding one or two other action cards. For example, adding a Smithy or two can speed the deck up considerably, bringing the average number of turns required to get 4 provinces down to 14. If an opponent is using Witches or Militia, replacing the Smithies with Moats can be very effective.
As powerful as it is though, the Big Money strategy is not much fun to play. Fortunately however, there are other strategies which are more enjoyable, and which are even more powerful than Big Money.
The first one I am going to discuss is one that is often referred to as the ‘Engine’ strategy. If you have played Dominion a few times already, you will have enjoyed the fact that some cards have ‘+1 Action’ allowing you to play another action card straight away, and then if that also has a ‘+1 Action’ too then you can play another, and so on. There are even some cards that have ‘+2 Actions’ and you can use one or more of these, combined with actions that allow you to draw more cards, to set off a chain reaction that will have you playing many cards each turn. Indeed the key to the Engine strategy is that after say, seven or eight turns, you should be in a position where you will be drawing and playing your entire deck every single turn. This means that as long as you have at least eight points of treasure in your deck, you will be able to buy a province every turn. If you have sixteen points and at least one ‘+1 Buy’ card, you can buy two provinces each turn.
That all seems pretty straightforward doesn’t it? In practice though, getting the balance of cards right is tricky. If you find yourself with a hand full of actions that just give you extra cards, you will only be able to play one of them; not enough of those cards though, and you will not be able to get the chain reaction going and the engine will come to a halt. Let us look in more detail at how best to build an engine using the ten kingdom cards recommended as the ‘First Game’ in the game instructions: Cellar, Market, Merchant, Militia, Mine, Moat, Remodel, Smithy, Village, and Workshop.
The key to getting an engine deck to operate efficiently is getting plenty of Smithies and Villages into the deck, and getting the balance between them right. However, you will also want to sprinkle in a few other cards that will improve the deck and/or hamper your opponents, such as Mine, Militia, Remodel, Workshop, and Cellar.
Here is an example of a strategy that will build a good engine. I am not saying it is the best possible strategy, but it is one that I find works for me, and beats Big Money most of the time:
- For the first two moves (when it is not possible to play an action card) I get a Remodel and a Village if I can, but if I find myself with a 5 coin / 2 coin split, I go for Market and Cellar instead, and get a Remodel the following turn.
- Focus on acquiring Villages and Smithies for the next few turns. Use Remodel to help with this, by converting the initial three estate cards into Smithies if possible. I try to ensure that the Villages slightly outnumber the Smithies at all times.
- Once I have a few each of Villages and Smithies, I get a Mine and start using it to upgrade the treasure, and a Workshop which I use to get more Villages and Smithies.
- By about 7 or 8 moves in, every turn I should be able to add a Village or Smithy using Workshop, upgrade a Treasure using Mine, upgrade cards and treasures using Remodel, and buy a useful card like Market, Workshop, Remodel, or possibly Militia.
- Soon I reach a point where I can buy a Province every turn, as well as performing the other improvements.
- Once I have two or three provinces, or if I think the game is coming to an end, I will use Remodel to turn Gold into Provinces, and if all goes according to plan this should be enough to win the game.
This strategy needs at least 5 Smithies and 5 Villages to stand a chance of working; I prefer to have more, especially Villages (maybe up to seven). Villages however, are a popular card, so if your opponents are also collecting them, there might not be enough to go round. For this reason it is important to get the Villages early in the game. When they run out, Market is the next best option.
There is one other very well-known strategy that I want to tell you about, and that is the one usually referred to as the ‘Rush Strategy’. When playing the Rush Strategy, the objective is not to compete for the most number of provinces, but to empty three stacks of cards and end the game as quickly as possible, and to be in the lead when that happens. In order to do this your strategy will need three crucial elements:
- To be able to acquire more than one card each turn.
- To choose a source of victory points that will give you the lead at the time the game ends
- To choose the correct stacks to empty.
To acquire more cards, you will want your deck to include actions which allow you to take a card. By far the best card for this is Workshop, though Remodel can also be useful. A card which allows you to have an extra buy, such as Market, should also be acquired.
When it comes to Victory Points, you will find that you are very unlikely to be able to afford many (if any) Provinces. You will be able to afford Estates, but unfortunately buying Estates will just clog up your deck and are unlikely to give you enough Victory Points to win. So that leaves Duchies as your best bet out of three standard Victory cards. However, if Gardens are in play, you should go for as many of those as you can; because your strategy already involves acquiring as many cards as possible, you will find that Gardens are excellent value for money and will earn you a lot of points. Furthermore, Gardens are priced in such a way that you can take one using Workshop.
You will need to choose three stacks to focus on. If Gardens is in play you should absolutely choose that one above all else and try to get as many as you can. Also, if Village is available, I would suggest that one too; it is almost always a good idea to have lots of Villages because they help get the engine going. Furthermore, because your opponents are also likely to be buying Villages, the stack will go down very quickly. A card which only costs 2 coins, such as Cellar, might be a good one to go for; if you have multiple buys then you could acquire lots of them at once and end the game unexpectedly, perhaps catching your opponents out. Generally though, you can just look to see which deck is running out the quickest, and help it on its way.
A Rush Strategy deck is naturally resistant to most forms of attack. Because your hand is often full of junk anyway, the Militia discard is no real threat. Also the negative points effect of Curses is reduced if you have lots of Gardens (and sometimes you can actually gain points from them) and if there are lots and lots of curses around it could actually empty a third stack for you, saving you a job.
The biggest problem you will have when playing the Rush Strategy is if one of your opponents is doing the same. In this case, the game will be over very quickly indeed, so it is important to get the Victory Points sooner than you otherwise would.
One final point I would like to mention, whatever strategy you are playing, is that you should be wary of leaving an opponent an opportunity of ending the game if he is in the lead. This is especially true when it comes to Provinces. You should avoid buying the penultimate Province if the scores are close, because an opponent could take the lead when he buys that last Province, and the game would be over before you had the chance to retaliate.
There are lots of other strategies available in the game, but one of the most important things to master is identifying which cards work best, in which combinations. So let us look at the individual cards now shall we?
I am going to assume that you are playing with the second edition of the game, which came out in 2016 (a few months after I had finished the first draft of this guide. Grrrr). The second edition is very similar to the first edition, with slightly improved artwork, and some card replacements. Out went the six most unpopular cards (Adventurer, Chancellor, Feast, Spy, Thief, and Woodcutter), and in came seven new ones (Artisan, Bandit, Harbinger, Merchant, Poacher, Sentry, and Vassal).
By the way, it is disappointing to me personally that Donald X (the game’s designer) decided to drop those particular cards, because I had written some jokes about the artwork on some of them, that I was quite pleased with. The Adventurer’s dress sense and the Spy’s spying technique had been mercilessly lampooned, I can tell you. Alas, however, I cannot now use those jokes. You will just have to imagine how hilarious they were. Sorry about that.

Artisan:
Cost 6 coins
Gain a card to your hand costing up to 5 coins. Put a card from your hand onto your deck.
This is the most expensive Kingdom Card, and rightly so as it effectively allows you to gain any other Kingdom Card you want (using pottery skills apparently). It is not quite as useful late on in the game though, as it cannot be used to acquire Provinces.
 Bandit:
Cost 5 coins
Gain a Gold. Each other player reveals the top 2 cards of their deck, trashes a revealed Treasure other than Copper, and discards the rest.
This guy can somehow take Silver and turn it into Gold. He is really an alchemist, not a Bandit.
This is a powerful (and fun) card, and is especially effective if an opponent’s strategy is reliant upon drawing from a small number of Silvers or Golds.
 Bureaucrat:
Cost 4 coins
Gain a silver card; put it on top of your deck. Each other player reveals a Victory card from his hand and puts it on his deck (or reveals a hand with no Victory cards).
Bureaucrat is a weak card. It does not actually improve your current hand, and the improvement to your next hand is less than overwhelming.
It can work reasonably well if combined with Chapel early in the game, allowing you get some Silver while trashing your weaker cards.
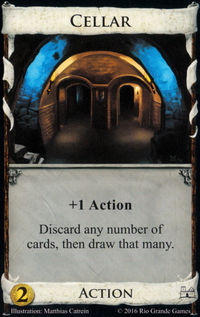 Cellar:
Cost 2 coins
+1 Action
Discard any number of cards, +1 Card per card discarded.
Cellar is a useful card that can improve the efficiency of your engine, allowing you to get rid of the junk in your hand. If ever you find yourself with just 2 coins to spend (especially in the first two turns), then Cellar is usually a good buy.
Cellars work well with Laboratory (i.e. increased hand size) but are less effective if an opponent is using Militia (i.e. small hand size).
Cellars are also useful if an opponent is playing Witches.
 Chapel:
Cost 2 coins
Trash up to 4 cards from your hand.
Chapel is a very powerful card. Donald X. Vaccarino has said that he believes that, relative to its cost, it is the most powerful card in the game.
The best way to use Chapel is to take it in one of the first two turns, along with a Silver or an action card that will enable you to gain cards. Then, you should trash your Coppers and Estates as quickly as possible, and acquire better cards instead. In this way, your deck will be small but every single card will be a good one, and the engine will get going much more quickly.
You will only need to buy one Chapel, and you will only need to use it early in the game (unless an opponent is playing Witches).
Because Chapel is so powerful, your opponents are likely to be using them too, so if you can you might want to consider using a Militia, which should slow them down.
Chapel also works well with Remodel because it is more likely to convert good cards into even better cards, rather than Coppers into mediocre cards.
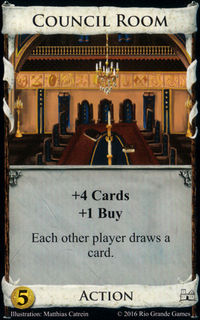 Council Room:
Cost 5 coins
+4 Cards
+1 Buy
Each other player draws a card.
Council Room functions a bit like Smithy but gives you a bit more benefit, and a bit of benefit to your opponents to balance it out.
In practice, the extra benefit to you is not particularly useful early in the game – the extra card is likely to be junk and you will not be able to use the extra buy. Later in the game however, the benefits could make quite a difference. For this reason, it is better to take Council Rooms later in the game.
 Festival:
Cost 5 coins
+2 Actions
+1 Buy
+2 coins
Festival is a powerful card that can be used in a similar way to Village, in an engine. Because of the +1 Buy and the +2 coins, it is significantly better than Village, and engines work more efficiently with them in it.
Try to get the first Festivals early in the game, as the +2 coins will make it easier to get more.
There are two problems with Festival however. The first is the high price of 5 coins, which makes them tricky to acquire and puts them out of range of Workshop. The second is the creepy character in the artwork who looks like a minor Batman villain.
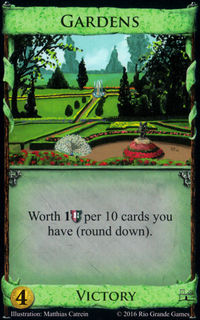 Gardens:
Cost 4 coins
Worth 1 Victory for every 10 cards in your deck (rounded down).
Your strategy with Gardens should be to claim as many as you can, build as big a deck as you can, and exhaust three stacks as quickly as you can to end the game before your opponents have time to get too many Provinces.
You should be aware though, that most of the time you are unlikely to be able to move fast enough to make this strategy work. The exception is if Workshop is in the game.
See section on Rush strategy above for more details.
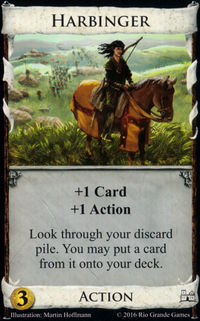 Harbinger:
Cost 3 coins
+1 Card
+1 Action
Look through your discard pile. You may put a card from it onto your deck.
An engine card that combines especially well with Library and Vassal, but not so well with sentry.
Avoid taking Harbinger early in the game, or if you have a small deck, because it is likely to come up when you do not actually have a discard pile.
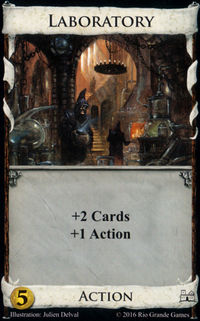 Laboratory:
Cost 5 coins
+2 Cards
+1 Action
Laboratory is a very useful card and fits into just about any deck. It creates an engine all by itself and does not rely on other cards to make it work.
It combines well with Market, Harbinger, Cellar, Chapel and Throne Room.
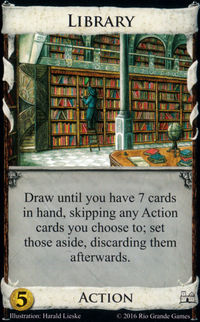 Library:
Cost 5 coins
Draw until you have 7 cards in hand. You may set aside any Action cards drawn this way, as you draw them; discard the set aside cards after you finish drawing.
Library combines well with Festival, Harbinger and Cellar, and is very good at countering Militia.
It combines poorly with Throne Room and Laboratory.
 Market:
Cost 5 coins
+1 Card
+1 Action
+1 Buy
+1 coin.
Market is a useful card to have in an engine – the +1 Buy in particular often comes in handy once you start drawing most of your deck each turn.
However, its high cost means that there are usually better cards to buy, and you are not likely to need more than one or two in a deck.
 Merchant:
Cost 3 coins
+1 Card
+1 Action
The first time you play a Silver this turn, +1 coin.
Ah, the cheerful market stall holder. She rewards you for spending silver, rather than copper or gold. I guess it is something to do with the amount of change she has on her?
This is not one of the most popular cards, but if you have Silver and you are playing most of your deck each turn, it could be effective.
 Mine:
Mine:
Cost 5 coins
Trash a Treasure card from your hand. Gain a Treasure card costing up to 3 coins more; put it into your hand.
Mine can be a useful card to have one or two of in an engine deck.
Of course it should only be used if your deck is based around coins; you would not want to include it if you have trashed your coins and are relying on actions that have purchasing power.
It says in my manual (in biro) that you have to say ‘mine’ when you play it, in the style of the seagulls from Finding Nemo.

Militia:
Cost 4 coins
+2 coins
Each other player discards down to 3 cards in his hand.
Militia can be effective at slowing down opponents early on.
Later in the game an efficient engine can play a single Militia every turn, which can also be powerful, and forces an opponent to take steps to counter it.
Militia is most effective if an opponent is using Cellar, or has used Chapel to thin down his own deck. It is less effective if opponents have lots of Victory cards or Curses, so avoid buying them if Gardens or Witches are in the game.
 Moneylender:
Cost 4 coins
Trash a Copper from your hand. If you do, +3 coins.
Moneylender is a great card early in the game, allowing you to get rid of those pesky Coppers and, unlike Chapel, actually gives you something for them. Chapel on the other hand, allows you to get rid of Estates too, and it is a lot cheaper. For these reasons Chapel is usually preferred to Moneylender if there is a choice between them (though some players actually like to use both).
The value of Moneylender is a lot less later on in the game, once most of the Coppers have gone. However, if you have one, you might want to consider buying some extra Coppers (for zero cost) if you have a spare Buy and you are likely to be able to draw most of your deck each turn.
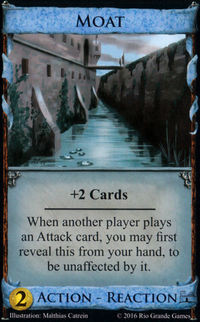 Moat:
Moat:
Cost 2 coins
+2 Cards
When another player plays an Attack card, you may reveal this from your hand. If you do, you are unaffected by that Attack.
Moat is usually a popular card with beginners, because they see it as the only way to counter an attack. The problem with Moat though, is that you need to happen to have it in your hand at exactly the right time, and that is often not the case. When not under attack, the +2 cards action is relatively weak.
Experienced players do not use Moat to defend against attacks as often, especially in two player games, preferring to counter-attack or use other methods to defend.
Moat’s effectiveness does improve in three or four player games though, since there are likely to be attacks more often.
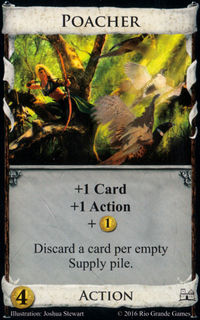 Poacher:
Cost 4 coins
+1 Card
+1 Action
+1 coin
Discard a card per empty Supply pile.
This is a powerful card that fits easily into most engines. The discard penalty does not kick in until near the end of the game, if it ever does, making this a good value card.
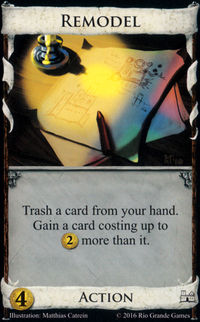 Remodel:
Cost 4 coins
Trash a card from your hand. Gain a card costing up to 2 coins more than the trashed card.
Remodel is often used to trash Estates early on in the game, in exchange for Villages, Smithies, or Silver.
It is also useful in the endgame, when you can trash a Gold with it to gain a Province. Also, if you want to end the game quickly, you can use it to help empty a particular stack. Another way to use it to end the game quickly is to convert a Province to another Province.
The effectiveness of Remodel really depends on which kingdom cards are available in the game, and whether or not Remodel will be able to upgrade from one to another. If there are good cards costing 2, 4 and 6 coins, then Remodel can be good. However, if there are lots of good cards that cost 3 or 5 coins, then Remodel is not so effective because Copper does not Remodel into 3 coin cards and Estates do not Remodel into 5 coin cards, and 5 coin cards do not Remodel into Provinces.
Generally, Remodel is a useful card to have, but do not depend on it too much as it can be quite slow to prove its worth.
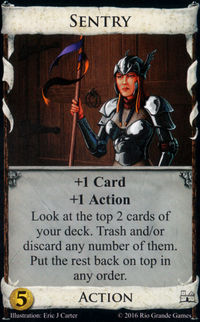 Sentry:
Cost 5 coins
+1 Card
+1 Action
Look at the top 2 cards of your deck. Trash and/or discard any number of them. Put the rest back on top in any order.
This engine card helps your engine run more smoothly (so perhaps it should be called a Mechanic not a Sentry? Ha ha ha!) by allowing you to sift out any useless cards.
Also, because you have the option to Trash, you can use it early on to strip down your deck, much like you would do with Chapel (see above). It is also a useful defence against Witches.
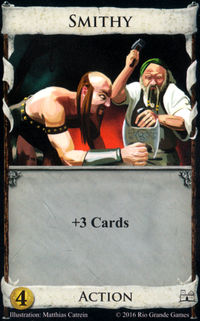
Smithy:
Cost 4 coins
+3 Cards.
Smithy is one of the most important cards for an efficient engine, as discussed earlier.
It combines well with Village.
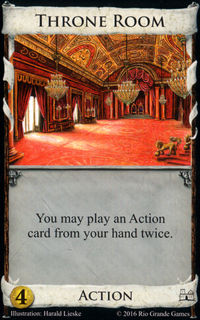 Throne Room:
Cost 4 coins
Choose an Action card in your hand. Play it twice.
Throne Room can work as part of an engine in a way similar to Village does.
It is not a good idea to buy Throne Room in the first two turns though – wait until you actually have some decent actions in your deck otherwise its action will be wasted.
Also, Throne room can act as a replacement for cards that run out, such as if everyone is collecting Villages, as long as you have a few in your deck already.
As with all engine cards, Throne Room combines well with Chapel.
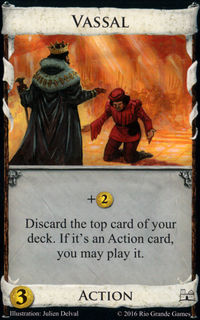 Vassal:
Cost 3 coins
+2 coins
Discard the top card of your deck. If it is an Action card you may play it.
This costs the same as a Silver, but has advantages over it, especially if you have lots of Action cards in your deck or you know what the next card is going to be.
Vassal combines will with Sentry or Harbinger.
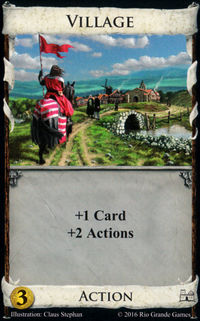 Village:
Cost 3 coins
+1 Card
+2 Actions
Village is one of the most important cards in the base set, as discussed in the section on engine building strategy above.
The feature that makes Village so important is the +2 Action. This feature enables you to include ‘terminal’ actions (that is, actions that do not give +1 action) in your strategy without forcing the engine to grind to a halt. Getting the balance right between Villages and terminal actions is crucial for success. If you base your engine around Villages and Smithies, you will need more Villages than if you are using Villages and Laboratories, because Smithy is a terminal action and Laboratory is not. In both cases the number of Villages you need will depend on how many other terminal actions you have in your deck.
Many beginners make the mistake of buying too many Villages. If you find yourself regularly not being able to use some of the extra actions from Village cards, then it is likely that your deck would have been better if you had chosen a different card – one that actually advances your strategy.
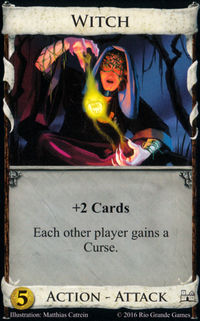 Witch:
Cost 5 coins
+2 Cards
Each other player gains a Curse card.
Witch is a powerful card, and a popular one. If it is present in the game it is likely that several players will go for it.
The key to being successful with Witch is to get an efficient engine going as quickly as possible so that you can play several Witch cards every turn. In this way, your opponents get lots of Curse cards; it also means that the Curse pile is likely to run out before your opponents can retaliate with Witches of their own.
If Chapel or Sentry are in the game, opponents will easily trash their Curse cards. If you have Witches in such a game, it is you who will be burned.
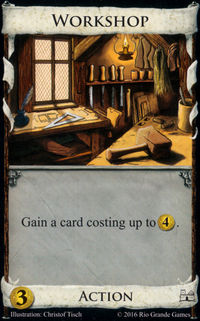 Workshop:
Cost 3 coins
Gain a card costing up to 4 coins.
Workshop is often used to pick up engine cards like Village or Smithy.
It also forms a key component in a rush strategy combined with Gardens (see details in section above).
It also makes me whistle the tune for ‘If I had a hammer’ every time I play it (well, sometimes anyway).
